Launch Controllers
There are 2 different types of launch controllers out there - hardwired, and wireless. I have used both before.
Wired Controllers
Note: I no longer use wired controllers. I have built several of them of which I will elaborate on below, however I now keep them with me only as backup system. I have since upgraded to a wireless controller, of which you will find details on at the end of this page.
To date, I have designed and built 2 different wired controllers.
Version 1
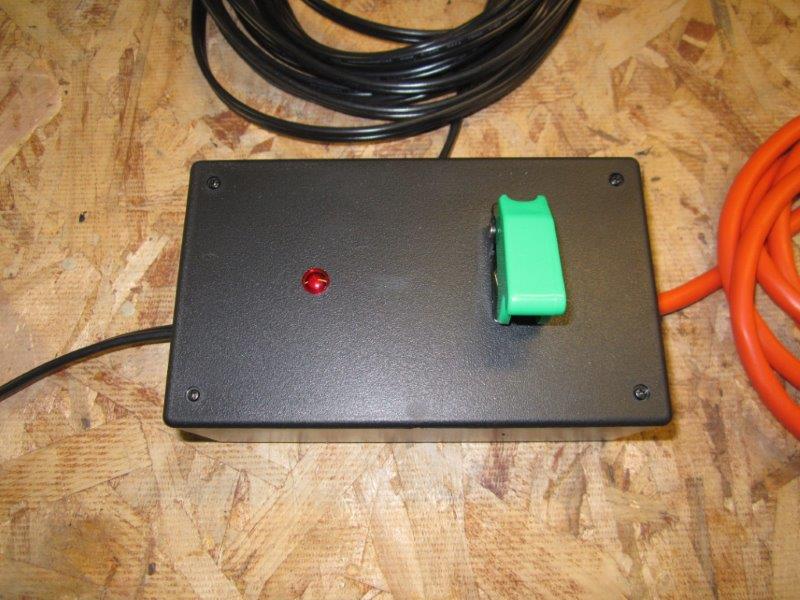
Pad Box
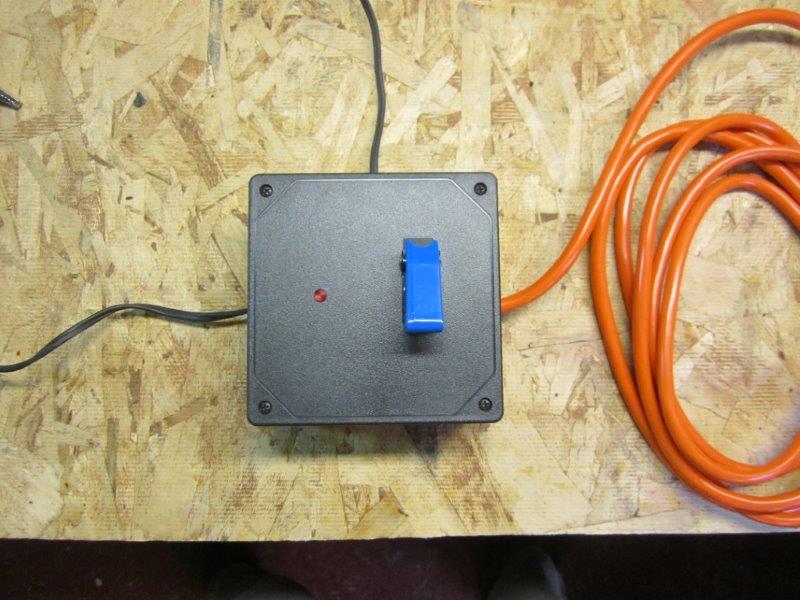
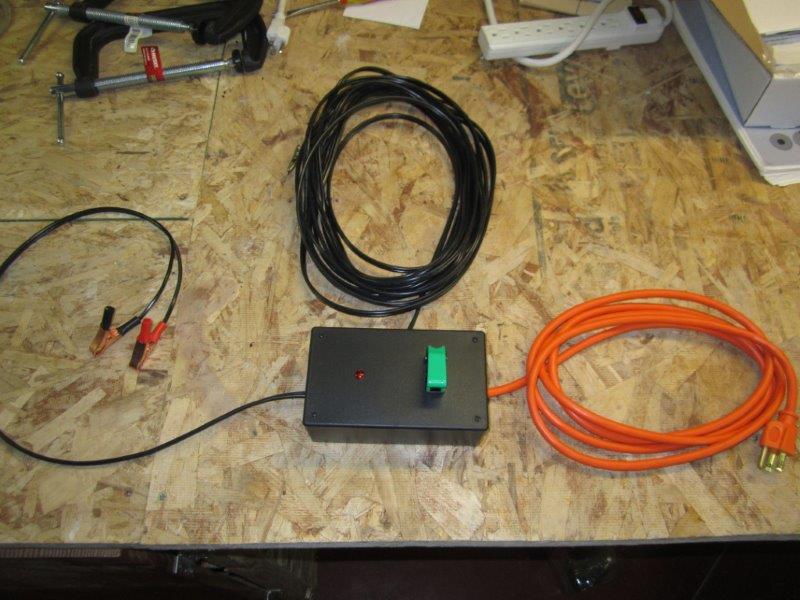
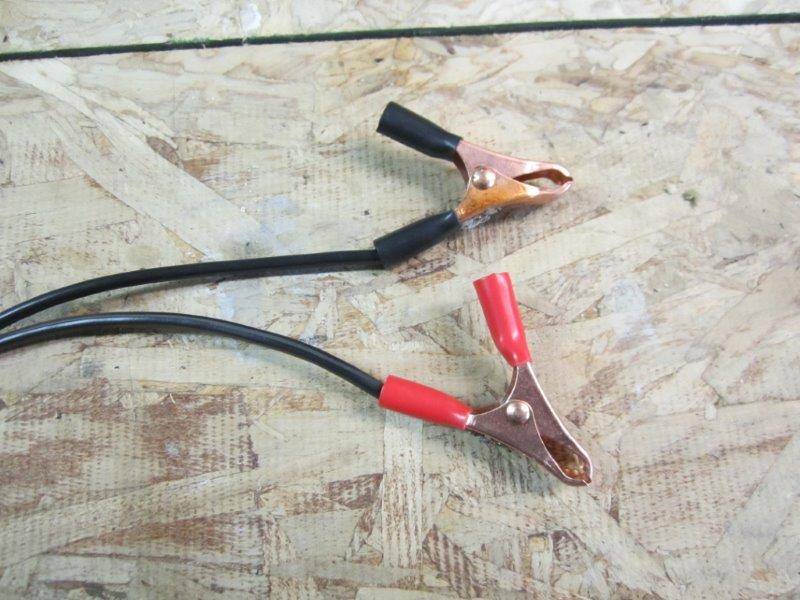
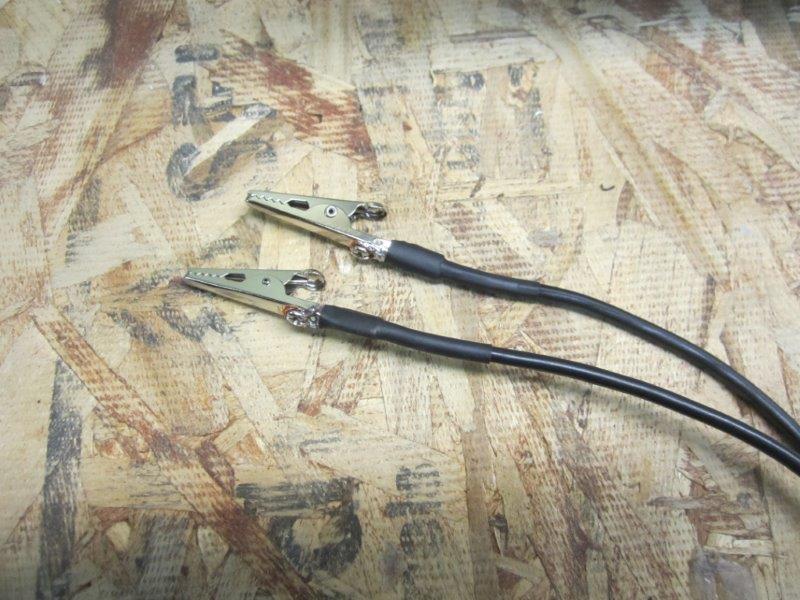
As the name suggests, the pad box goes out at the "rocket end" of the equation. Under the blue cover is an on/off toggle switch, as well as a power indicator LED. (It does NOT check igniter continuity - not included in this system.) The wires on the left have red and black battery clips which connect to the pad battery. Said battery is a 12V lawnmower battery from O'Reilly Auto Parts. The wires coming out the front go to the rocket (alligator clips), and the extension cord out the right side plugs into the wire reel.
Wire Reel
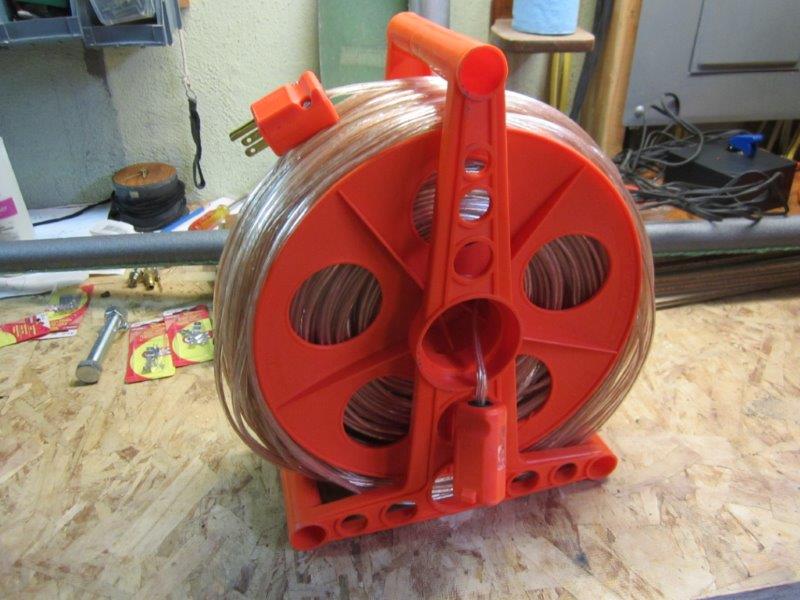
The wire reel consists of 500' of rubber lamp cord from Home Depot. They sell it in 250' rolls, so I spliced 2 of them in the middle using solder/heat shrink tube. On each end of the wire is an extension cord plug. A plastic reel is used for storage, also available from Home Depot.
Controller

The controller end has 2 momentary switches. (A push-button and the toggle switch.) To launch, plug the controller into the end of the 500' wire, then push and hold BOTH buttons to ignite.
Wiring
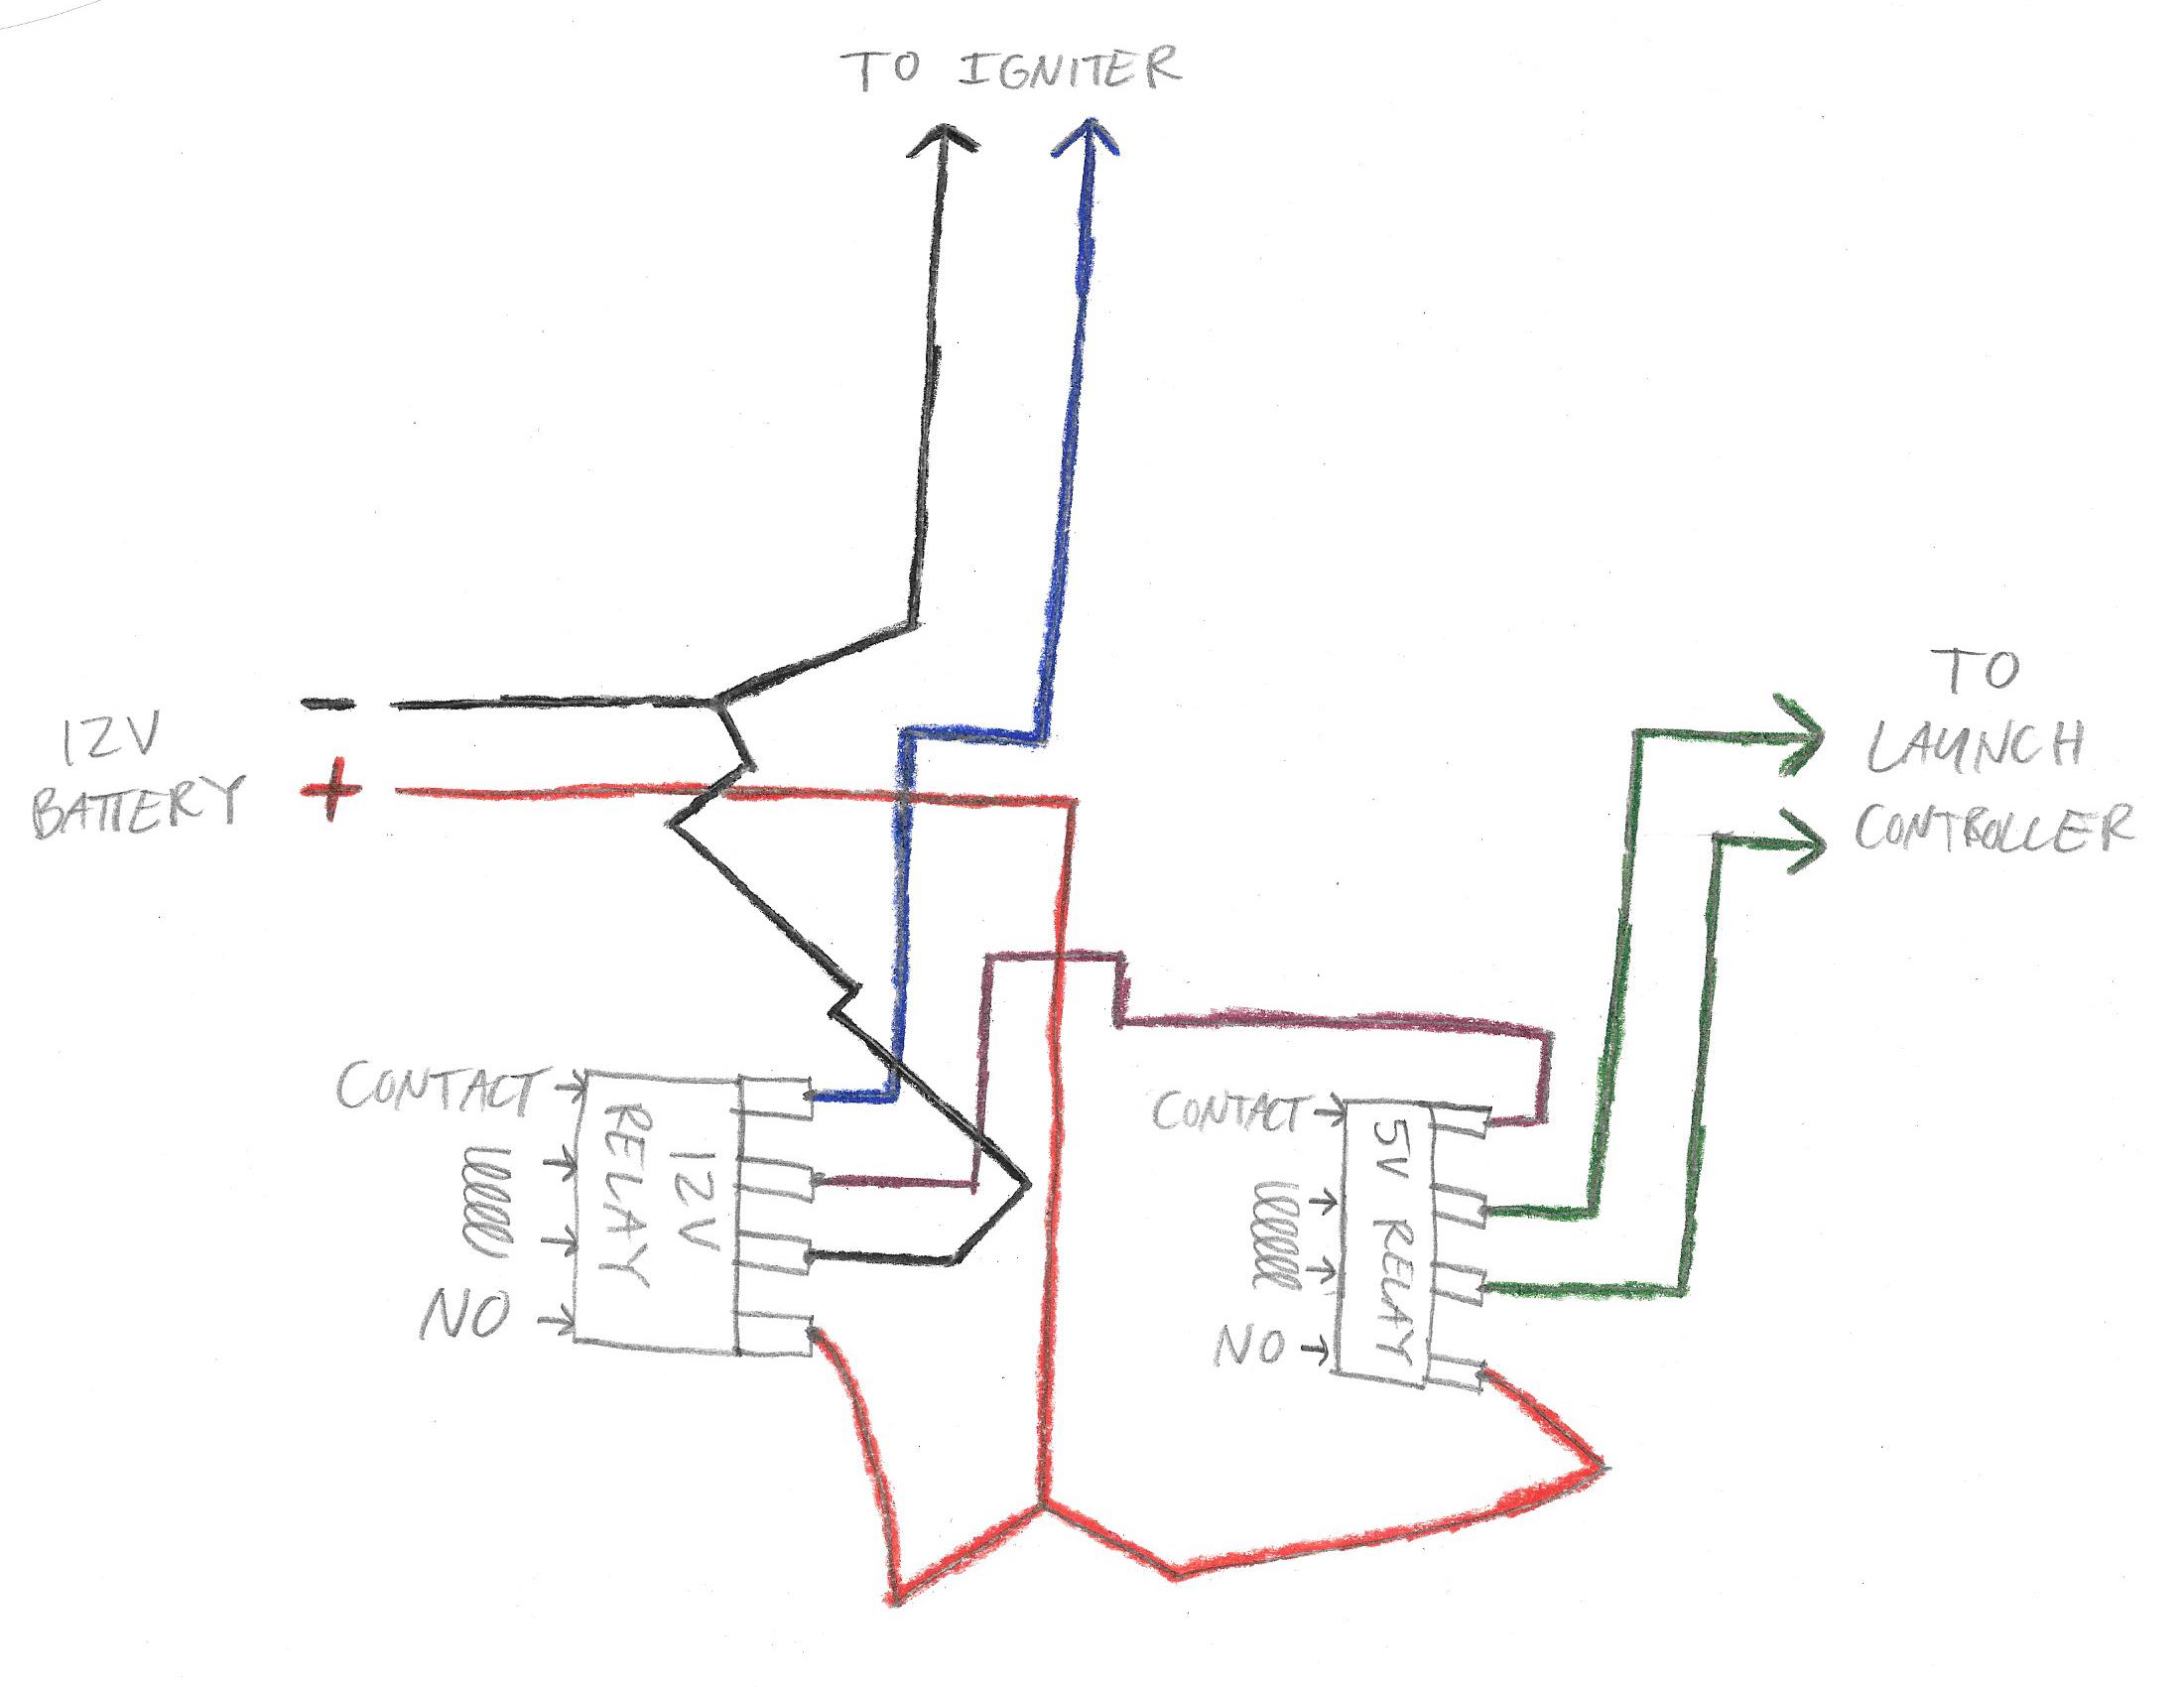
Thanks to some help from Surplus Gizmos, a local electronics surplus store, I was able to wire the pad box to get it to do what I wanted it to do. I used 2 relays - one 6V and one 12V. Essentially the controller trips the small relay, which then trips the bigger relay to supply a full 12V to the igniter.

The controller is much simpler.
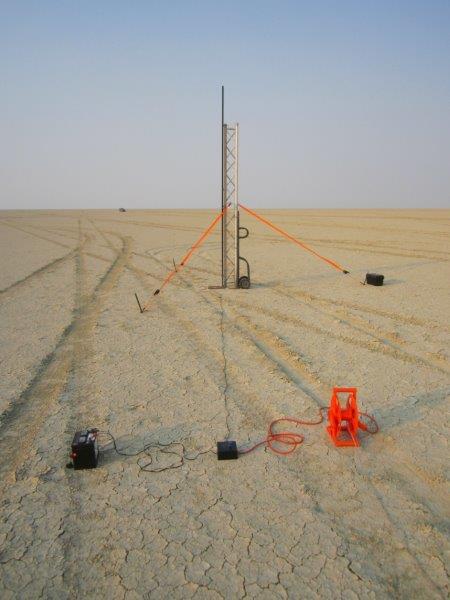
This system in action at BALLS 23.
When launching a rocket, the steps are as follows:
- Load rocket on pad/arm altimeters, etc.
- Insert igniter.
- Connect igniter to launch system.
- Turn power switch at pad box ON.
- Retreat.
- When ready, and only when ready to launch, plug the controller into the end of the wire.
- Hold BOTH switches to launch.
- When launch is complete, unplug controller from wire.
Version 2
Later on, I built a second iteration which works the same way, but is a little more robust with slightly different inner workings.
Pad Box
Externally, the pad box is exactly the same as the Version 1 - on/off switch with power indicator LED, battery wires on the left, clip leads on the front, and launch controller wires on the right. The inside however is a little different. I only used a single 12V relay when, after doing some testing, I discovered that the current from the controller end (9V) was enough to trip the 12V relay by itself. This meant I could leave out the 5V relay for simplicity's sake and ease of wiring. The controller wires are tied to the coil of the relay, the negative side of the pad battery is tied to one side of the clip leads, the positive side of the pad battery is tied to the normally-open contact of the relay, and the other side of the clip leads is tied to the relay output.
Here we have the entire pad end assembly. Another change from Version 1 was using heavier wire this time for the battery and alligator clip connections.
Bigger battery clips.
Heftier alligator clips, as well.
Controller
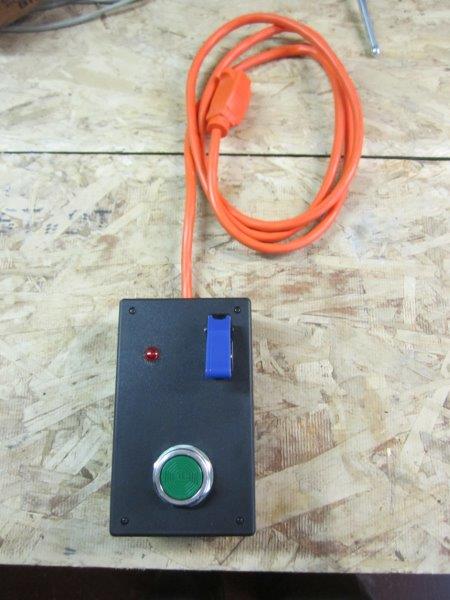
The controller also has more features. I saw that large green industrial control button at Surplus Gizmos, and just knew I HAD to turn it into a launch switch. ;) The arming switch underneath the blue cover is an on/off (not momentary) toggle switch just like at the pad box. In addition to the LED, I also added a beeper. When you arm the system, the LED powers on, and the beeper sounds. Then as soon as you push the launch button, everything goes silent at the controller and the igniter fires. (9V battery inside the controller sends current to the relay, same as Version 1.)
You'll notice all the extension cord plugs are the same on both respective systems. So, while a few of the new components are wired a little differently, functionally they work the same and you can use everything interchangeably. This can be particularly helpful if, in the event a pad box goes out (blown/fused relay, water damage, bricks, etc.), you can just swap out for the other one.
Both were very fun projects!
Wireless Controllers
In 2015, I decided it was time to upgrade to a commercial wireless system. This was due to a number of factors, namely that I was starting to need greater separation from my projects during launch. Plus, they are SO easy to set up and take down - no coiling and uncoiling of wire reels!
I didn't have to think twice about who's system to buy - Brad Wilson, aka the Rocket Rev, is the proprietor of Wilson F/X. His wireless systems are VERY high-end, very robust, and have a track record like no other system out there. While his products are more geared towards club use, he offers single-pad systems as well which are exactly what I was looking for. His systems have been tested successfully to a range of 1.1 miles.
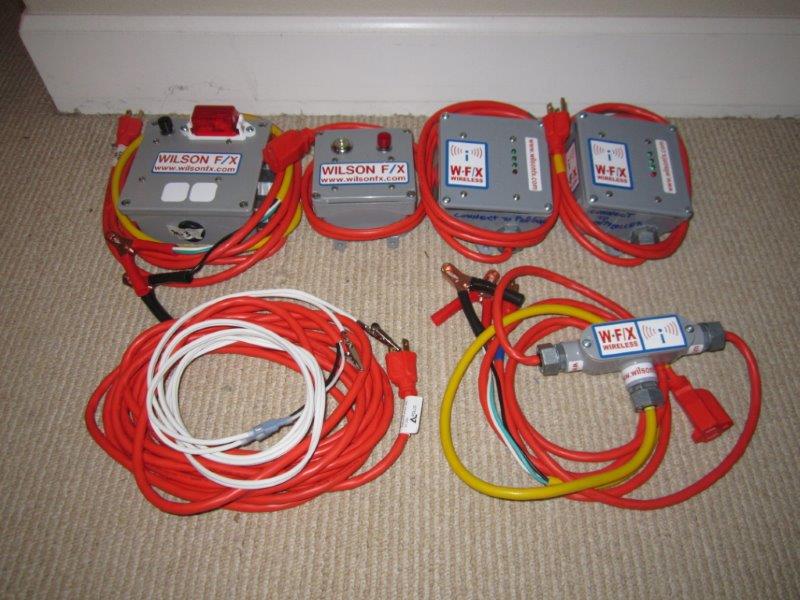
Here is the full layout of Brad's system. In the back row (from left to right) is a single-pad box (PBU-1), a single-pad controller (LCU-1), and 2 wireless transmitters (WRU-1 x 2). In the front row is a set of alligator clips and a power adapter which is used to power the LCU-1 and WRU-1 at the controller end. The entire system runs off 2 x 12V batteries (1 at each end.)
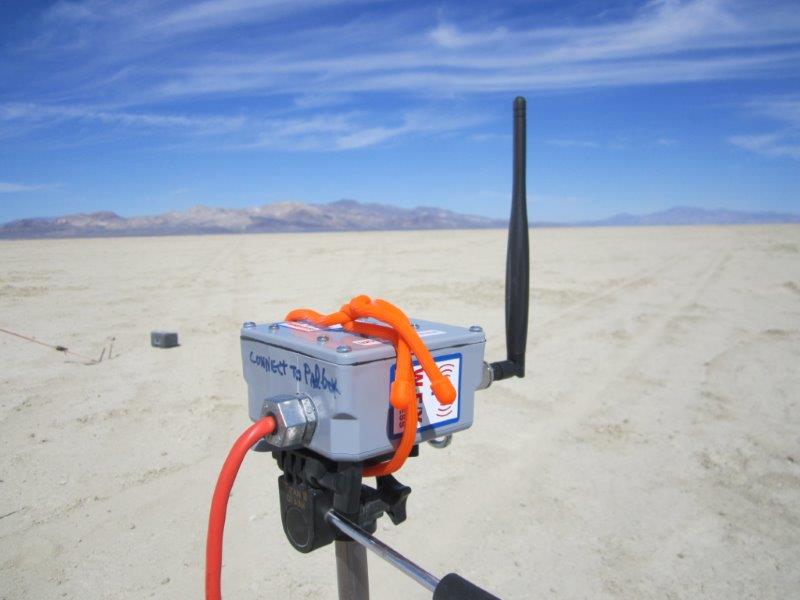
Its "maiden voyage" was at BALLS 24. Before I left for the launch, I wanted to come up with a slightly more elegant solution than just setting my wireless unit (WRU-1) on the ground out at the pad. A camera tripod and heavy-duty "gear tie" from Home Depot solved this issue.
I set up my "pad station" with PBU-1, lawnmower battery, tripod, and WRU-1 like this.

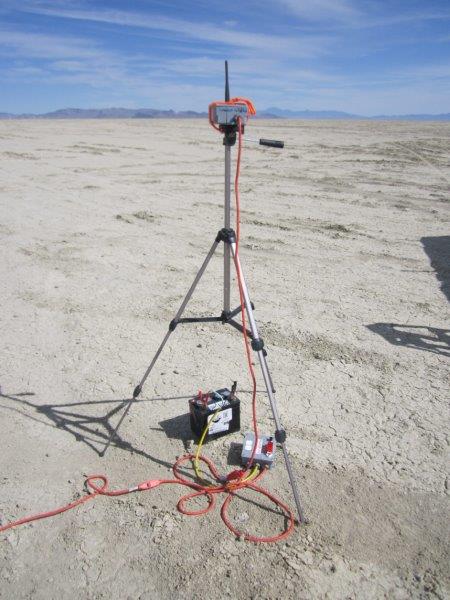
Here is my full setup with my tower and Wilson F/X launch system.
The procedure is as follows when launching a rocket:
- Load rocket on pad/arm altimeters, etc.
- Insert igniter.
- Connect igniter to launch system.
- Power PBU-1 and WRU-1 ON by connecting the battery clips to pad battery.
- Check igniter continuty by pressing black button on PBU-1. If it beeps continuously and the red light powers on, that means you're good to go!
- Retreat.
- Set up LCU-1, other WRU-1, power adapter, and battery.
- Power LCU-1 and WRU-1 ON by connecting the battery clips.
- Turn key and push red launch button to ignite.
- When launch is complete, power everything down.
I would HIGHLY recommend this system to any club or individual who is thinking about upgrading their launch system. The "Rocket Rev" is a really great guy to work with, his products and customer service are top-of-the-line, and always responds quickly to emails or phone calls. Visit www.wilsonfx.com!